WHAT IS ZAPIER?
Zapier is a third-party application that provides the technology to easily integrate data between web apps or applications with web based integration points. Zapier calls this configuration a “Zap”. Every individual form, application or endpoint requires a unique “Zap” to be configured. “Zaps” consist of Triggers and Actions. When a “Trigger” initiates the event, Zapier will automatically post the data into Captorra with an “Action”.
Link your account
To use the Captorra Zapier integration, please click the link below while logged in to your Zapier account. This will grant access to our integration.
https://zapier.com/developer/public-invite/6689/d3063611bed602e9f87dd2af1def6203/
Step-by-Step Guide
The following is a short guide on setting up a basic integration with Captorra using Zapier. This example will cover setting up the Captorra “Action” step. You will first need to set up the “Trigger” step. This typically consists of choosing the application you wish to integrate with Captorra. This could be any number of applications but the “Trigger” event is typically “New Entry”. In the example below the “Trigger” event will have been a form post.
1. Choose App & Event
The Captorra app will only be available if you have already clicked the link above and accepted the invite. From the add Action section, search for Captorra and select the latest version of the app and choose the appropriate Action Event. For this example we will choose Create Intake; this will create an intake in your Captorra environment with the entry provided from the Trigger step. Click ‘Continue’.

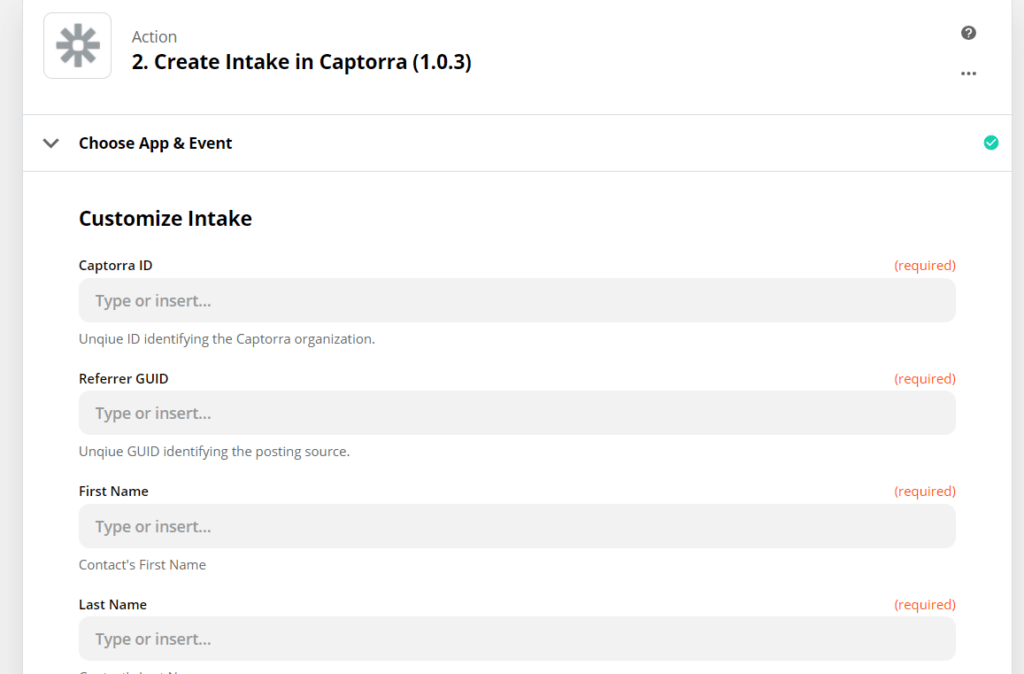
2. Customize Intake
There are 4 required fields when Creating an intake in Captorra. The Captorra ID and Referrer GUID will be provided to you by Captorra Support upon request. The Captorra Id is a unique ID identifying the Captorra organization and the Referrer GUID is a unique GUID identifying the posting source.
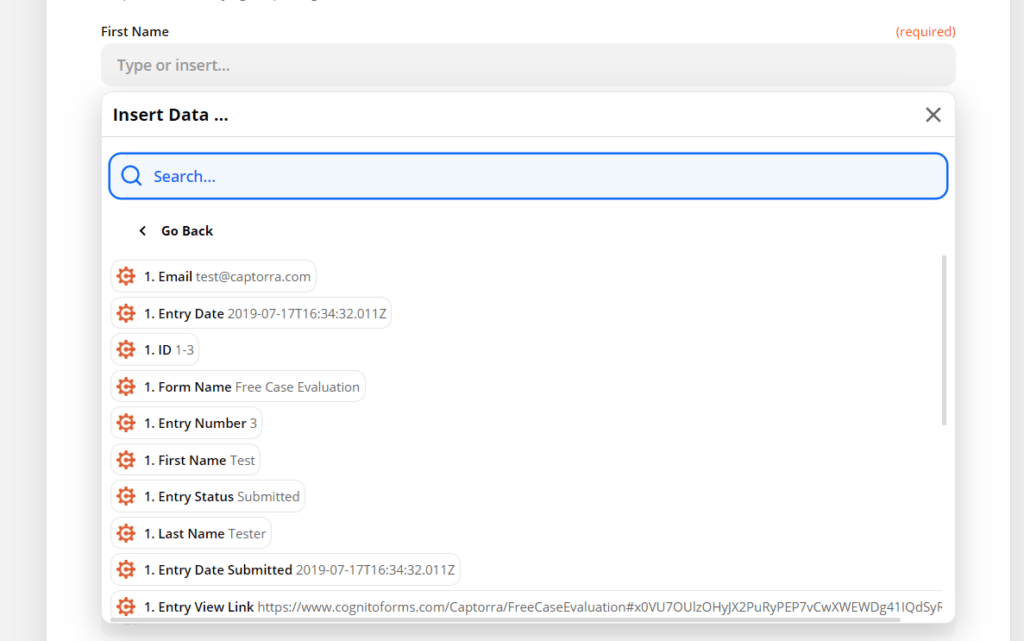
3. Insert Data
If you’ve correctly set up your Trigger step when you click on a field on the Customize Intake section you will be presented with a dropdown similar to the one shown below. From here you can choose what data will post into the chosen field in Captorra. For this example we have set up a New Entry from a Form as our Trigger.
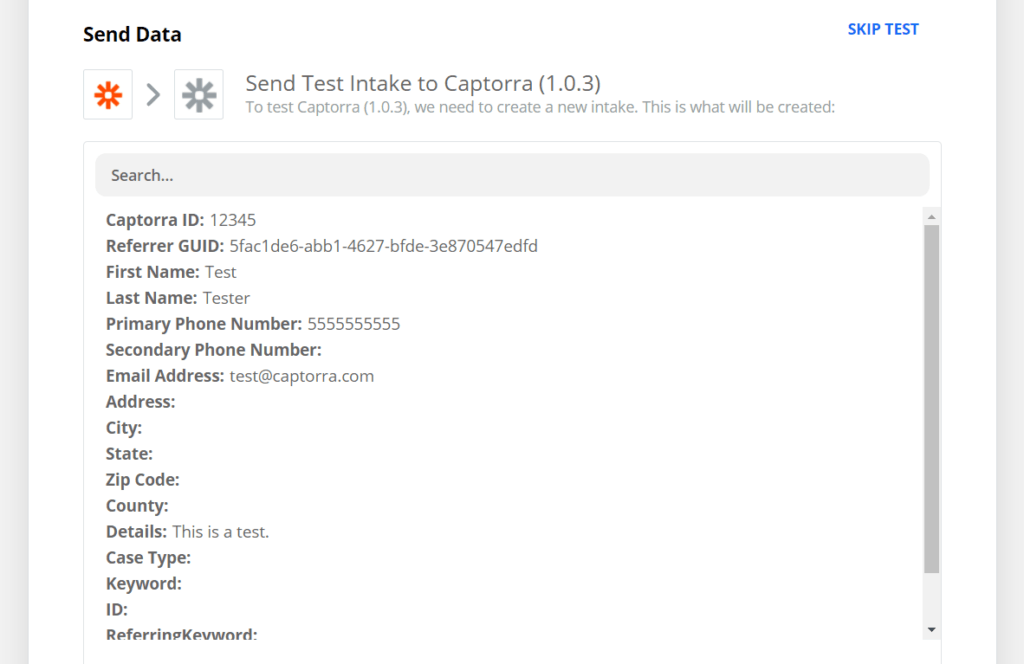
4. Test & Review
After Inserting data you can choose to send a Test and Review the response.
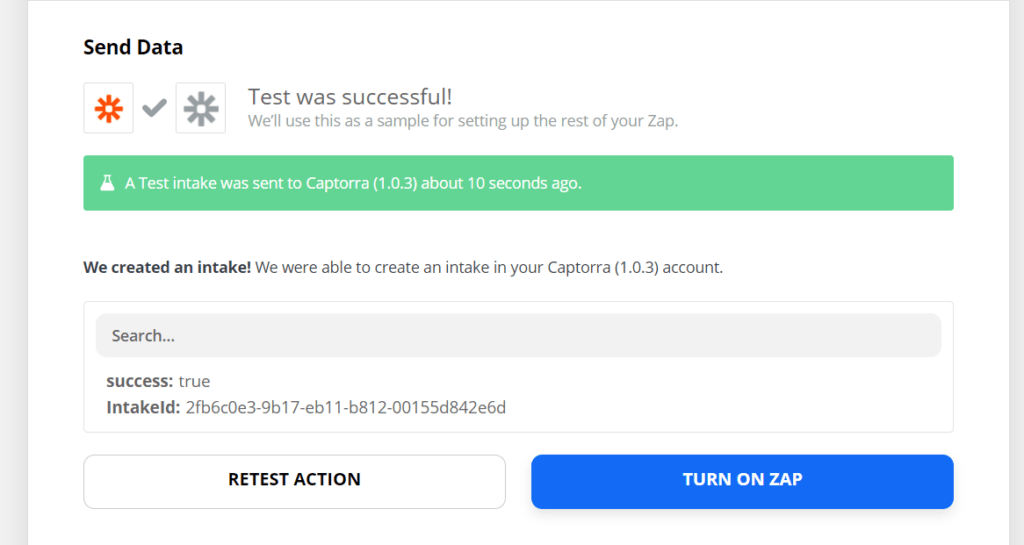
5. Test Successful!
If your test was successful a response from our API like the below will be shown. A message with success: true and the intake id that was created if the intake was successfully created in Captorra.